Guest follow-up automation
Use the follow-up draft in Communications → Automations to create a pastoral task after attendance is recorded. The automation remains a draft until you finish reviewing and testing it.
Steps
Open Automations
In the sidebar, open Communications → Automations. You can also go directly to /admin-church/workflows.
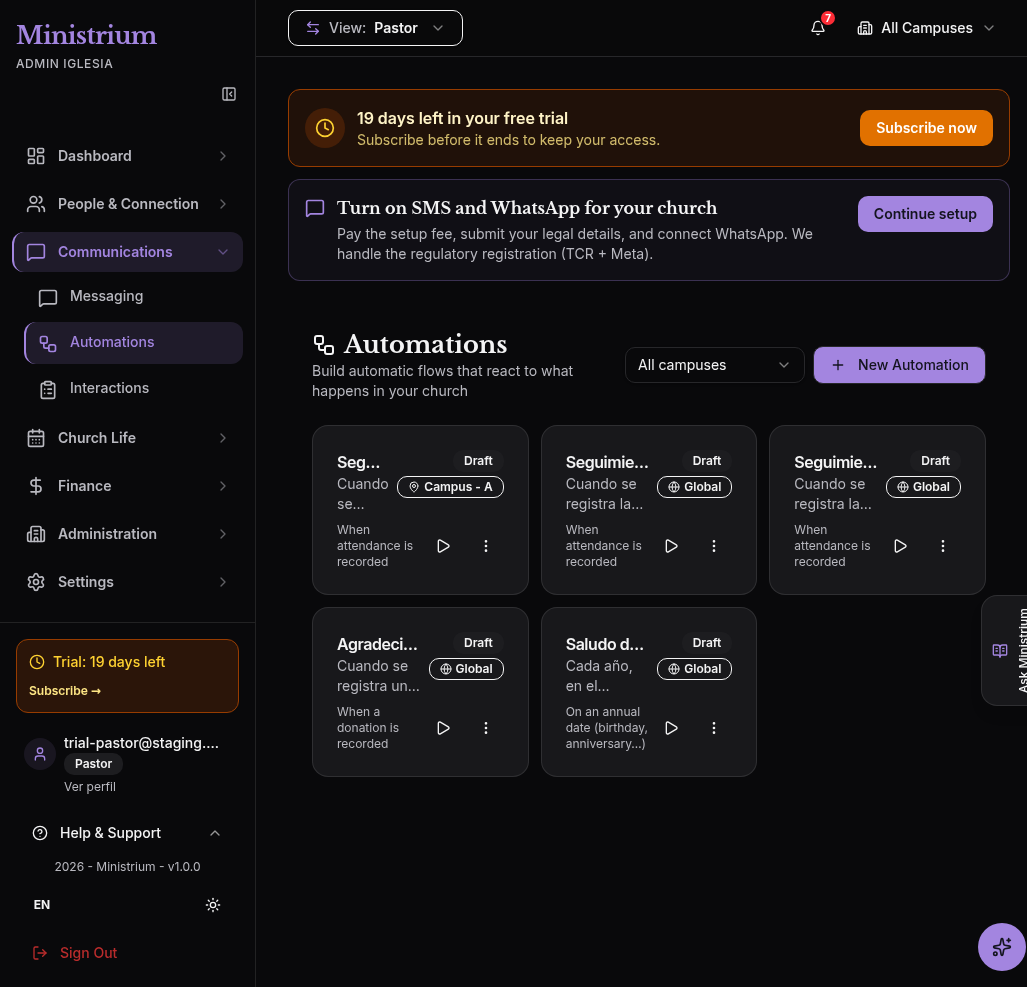
The real list may show the orange trial banner and the SMS and WhatsApp onboarding bar. They are separate UI elements and are not part of this configuration.
Open the correct draft
Find the draft whose description says that recording a guest’s attendance for the first time creates a follow-up task for the pastoral team. Open that draft.
Its name may vary by church. For example, a local draft may include the campus name (such as Canton GA in the screenshot); that is not a product-wide label. A Local badge or campus name limits the scope, while Global applies to all campuses.
Review the trigger and conditions
On the Builder tab, confirm:
- Trigger: When attendance is recorded.
- Match: All conditions.
- The visible conditions match your church’s intended follow-up.
If no conditions are configured, the automation runs whenever that trigger fires. Use + Add condition if you need to narrow it, and select only options that are available in your UI.
Review the follow-up task
Under Steps, confirm that the action is Create task and review these values:
- Type:
follow_up - Title: Dar seguimiento a la asistencia
- Notes: Contactar al miembro tras su participación.
- Due in (days): 2
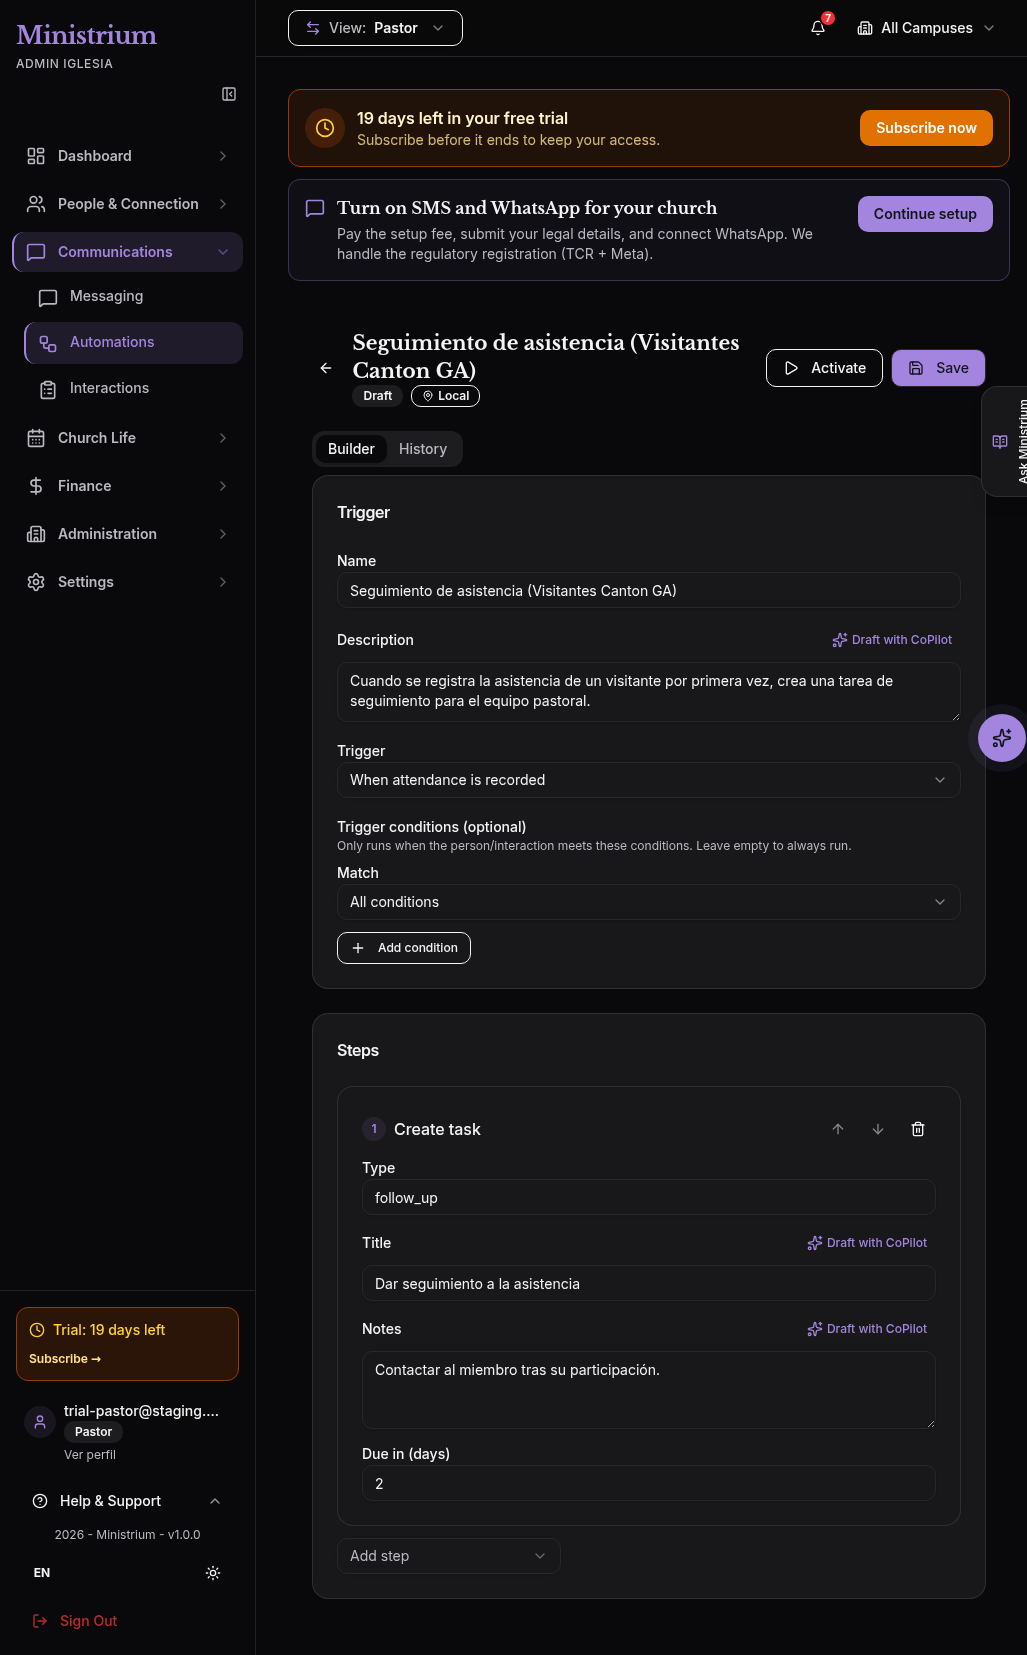
The editor shows the first-visit draft, attendance trigger, and follow-up task. The trial banner and the SMS and WhatsApp onboarding bar may remain visible in the real UI.
Save and test
Select Save and keep the automation in Draft while reviewing it. Test the flow with a test guest record according to your church’s testing process, then confirm that the resulting task has the correct title, notes, and due date.
Activate after testing
Only after the test passes, return to the editor and select Activate. The Subscribe now button belongs to the trial banner; it is not used to configure or activate this automation.
A description that says “first time” does not replace a condition. If the editor shows no conditions, verify during testing whether the trigger already produces the intended scope; otherwise, configure an available condition before activating.
If the draft is not available
Select + New Automation. In the dialog, enter a Name and Description, choose the Trigger, and add optional conditions. The initial trigger may be When a person is created; change it to the appropriate attendance trigger before selecting Create.
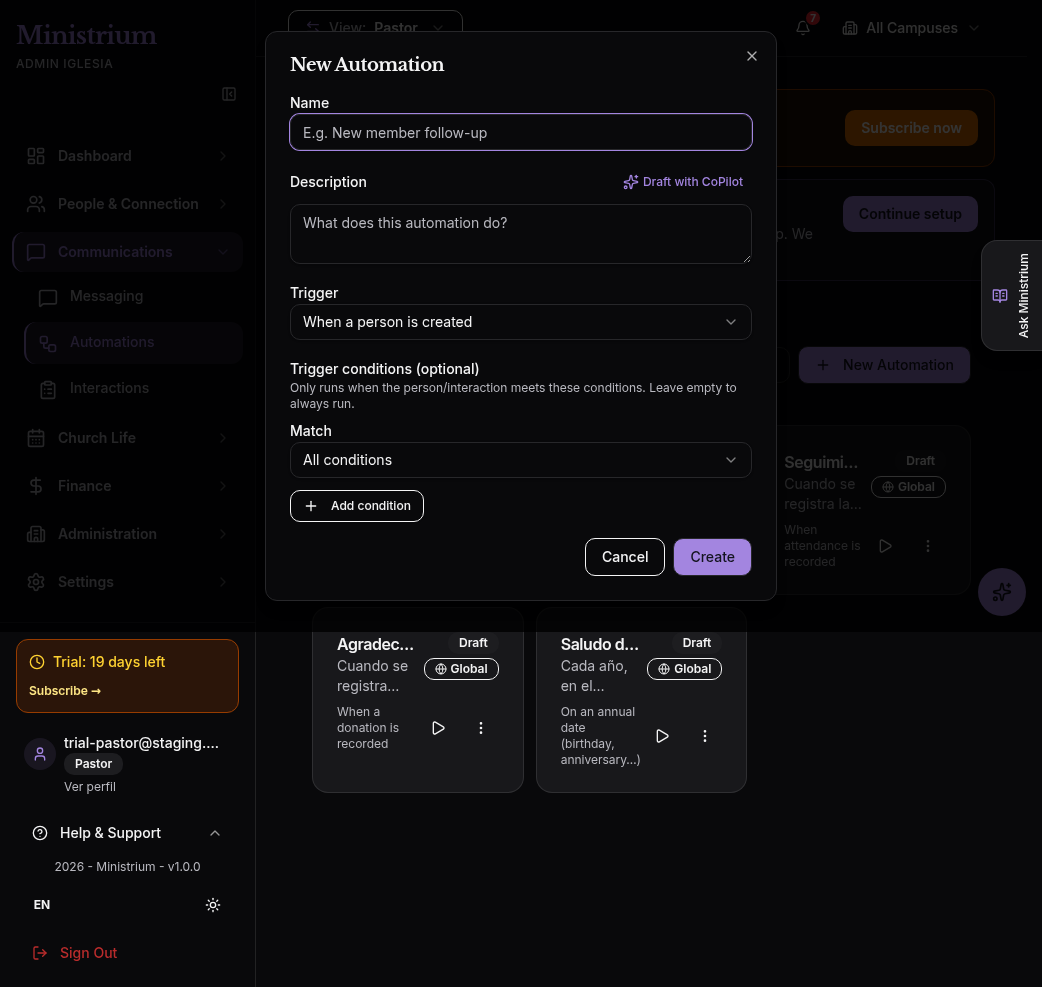
The real dialog includes Name, Description, Draft with CoPilot, Trigger, optional conditions, and the Cancel and Create buttons.
After creating it, add the Create task step, save, test, and activate only after the result is correct.